
Introduction
In electronics and DIY hardware projects, jumper wires play an essential role in connecting components quickly and safely. One commonly used type is the jumper cable male to female. These cables are widely used in microcontroller projects, breadboard prototyping, Arduino setups, and Raspberry Pi development.
Beginners often struggle to understand the difference between male to male, female to female, and male to female jumper wires. Each type serves a different purpose in circuit building. The jumper cable male to female is particularly useful because it allows you to connect a pin header to a breadboard or module easily.
This guide explains everything about jumper cable male to female wires, including how they work, where they are used, and how to choose the best ones for your electronics projects.
What is a Jumper Cable Male to Female
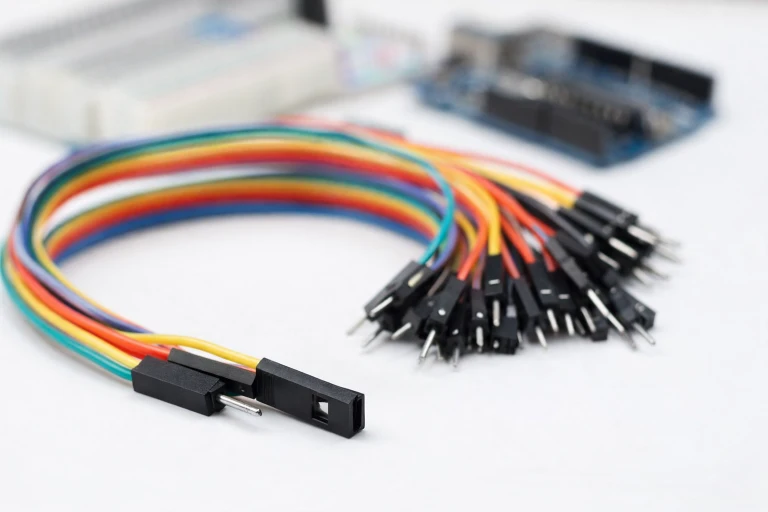
A jumper cable male to female is a small electrical wire used to connect electronic components. One end of the cable has a male connector and the other end has a female connector.
The male side has a metal pin that can be inserted into a breadboard or female socket. The female side has a socket that can receive a male pin from a component or module.
These jumper wires are commonly used in:
- Arduino projects
- Raspberry Pi circuits
- Breadboard prototyping
- Sensor connections
- Robotics electronics
- DIY electronics learning kits
Because of their flexible design, they allow quick connections without soldering.
Structure of a Male to Female Jumper Wire
A typical jumper cable male to female consists of three main parts.
1. Male Connector
The male connector has a small metal pin that fits into breadboards or female headers. It is designed to make firm electrical contact.
2. Female Connector
The female connector is a socket that accepts a male pin. It is often used to connect modules or sensors that already have header pins.
3. Insulated Wire
The insulated wire connects both ends and carries the electrical signal. The insulation protects against short circuits and damage.
These wires usually come in multiple colors such as red, black, yellow, green, and blue. Different colors help organize circuits and identify connections easily.
How Jumper Cable Male to Female Works
The main purpose of a jumper cable male to female is to transfer electrical signals between components.
Here is a simple example:
- The male pin is inserted into a breadboard row.
- The female socket connects to a module pin.
- Electricity flows through the wire between the two points.
This allows sensors, LEDs, motors, or other devices to communicate with a microcontroller.
Because jumper wires do not require soldering, they are perfect for testing circuits and building prototypes.
Common Uses of Male to Female Jumper Wires
These jumper wires are extremely popular in electronics because they make circuit building easy.
Connecting Arduino to Sensors
Many sensors have male header pins. A jumper cable male to female allows the sensor to connect directly to a breadboard or Arduino pins.
Breadboard Prototyping
Breadboards are used to test circuits before permanent soldering. Male to female wires help connect modules to the breadboard.
Raspberry Pi GPIO Connections
The GPIO pins on Raspberry Pi boards often require female connectors. Jumper wires help connect sensors, LEDs, and modules.
Robotics Projects
Robotics kits use multiple sensors and motors. Jumper wires simplify the wiring process.
Educational Electronics
Students learning electronics frequently use jumper cables because they are safe, simple, and reusable.
Types of Jumper Wires
Understanding the different types of jumper wires helps avoid connection mistakes.
Male to Male
Both ends have metal pins. Used to connect breadboard rows together.
Female to Female
Both ends are sockets. Used for connecting modules with male pins.
Male to Female
One end has a pin and the other has a socket. Used to connect header pins to breadboards.
Each type has a specific purpose in circuit design.
Advantages of Using Jumper Cable Male to Female
There are several reasons why electronics enthusiasts prefer these cables.
Easy to Use
No soldering or special tools are required.
Reusable
The wires can be used repeatedly in different projects.
Flexible
They bend easily and fit into tight spaces.
Perfect for Prototyping
They allow quick changes when testing circuits.
Affordable
Jumper wire kits are inexpensive and widely available.
How to Choose the Best Jumper Cable Male to Female
Not all jumper wires are the same. Choosing good quality wires improves reliability.
Consider these factors before buying.
Wire Length
Common lengths include:
- 10 cm
- 20 cm
- 30 cm
Shorter wires reduce signal noise, while longer wires provide flexibility.
Connector Quality
High quality connectors ensure firm connections and prevent loose contacts.
Insulation Material
Durable insulation protects wires from breaking.
Color Variety
Color-coded wires help organize circuits and prevent mistakes.
Safety Tips When Using Jumper Wires
Although jumper cables are simple tools, proper use is important.
Follow these safety tips:
- Avoid connecting wires incorrectly
- Check circuit diagrams before powering the board
- Do not exceed voltage limits
- Keep wires organized to avoid short circuits
- Disconnect power when modifying circuits
These precautions help protect both your electronics and your devices.
Jumper Cable Male to Female in Arduino Projects
Arduino development boards are one of the most common platforms where jumper wires are used.
Typical Arduino connections using male to female jumper wires include:
- Connecting temperature sensors
- Wiring ultrasonic distance sensors
- Attaching LCD displays
- Connecting LED modules
- Interfacing motor drivers
Because Arduino uses header pins, jumper wires provide a quick and reliable connection.
Beginner Projects Using Jumper Wires
If you are new to electronics, these beginner projects use jumper cable male to female wires.
LED Blink Circuit
A simple LED connected to an Arduino board using jumper wires.
Temperature Sensor Monitor
Connect a temperature sensor to read data from the environment.
Motion Detection Alarm
Use a PIR motion sensor to trigger an alarm or LED.
Ultrasonic Distance Measurement
Measure distance using an ultrasonic sensor and Arduino.
These projects are perfect for learning electronics fundamentals.
Future of Breadboard Prototyping
Even with modern PCB design tools, breadboards and jumper wires remain essential for experimentation.
Engineers, hobbyists, and students still rely on jumper cables to test ideas quickly before building permanent circuits.
As robotics, IoT devices, and smart electronics continue to grow, jumper wires will remain an important tool in electronics development.
Conclusion
A jumper cable male to female is one of the most useful tools in electronics prototyping. It allows quick connections between modules, sensors, microcontrollers, and breadboards without soldering.
These cables are widely used in Arduino projects, Raspberry Pi setups, robotics systems, and educational electronics experiments. Their flexibility, low cost, and ease of use make them essential for both beginners and experienced engineers.
By understanding how these jumper wires work and choosing high quality cables, you can build reliable circuits and complete electronics projects more efficiently.
FAQ
What is a jumper cable male to female used for
It is used to connect electronic components where one side requires a pin connection and the other requires a socket connection.
Are jumper wires safe for electronics
Yes, they are safe when used correctly and within the voltage limits of the circuit.
What is the difference between male to male and male to female jumper wires
Male to male wires have pins on both ends, while male to female wires have one pin and one socket.
Can jumper wires carry high voltage
No. Jumper wires are designed for low voltage electronics such as Arduino and microcontroller circuits.
Where can I buy jumper cable male to female wires
They are available from electronics stores, online marketplaces, and hardware kits designed for Arduino or Raspberry Pi.